

This is something nobody tells you when you start shooting weddings: your work can be genuinely stunning, your editing flawless, your timeline flow perfect, and a couple can still leave the experience feeling… fine.
Not bad or sending a complaint, just fine.
And fine doesn’t get you the review that says “she made us feel so taken care of.” Fine doesn’t get you the referral with the “omg you HAVE to book her” energy behind it. Fine definitely doesn’t get someone to book you again for their vow renewal five years later, or to buy the album they were on the fence about.
Your couples don’t just remember the photos. They remember how the whole thing felt.
Here’s the part most photographers miss: client experience isn’t something that happens on the wedding day. It’s not one nice gallery delivery email or one thoughtful touch. It’s the entire sequence from the second someone lands on your inquiry form to the moment they’re tagging you in an anniversary post years later. And every single link in that chain either builds trust or quietly lets it slip.
So today, I’m handing you the full wedding photographer client experience blueprint. Every phase, what to actually send at each one, real email templates you can steal and rewrite in your own voice, and the mistakes that quietly undo all your hard work. It’s long, on purpose — this is the kind of thing worth doing properly once instead of half-building it every year. Bookmark it, come back to it phase by phase, whatever works. By the end you’ll know exactly where your client experience is genuinely strong and where it’s currently… fine. 😅
What “client experience” actually means for wedding photographers
Quick definition before we go further, because this term gets thrown around a lot without anyone actually unpacking it.
Client experience, for a wedding photographer, is every interaction a couple has with you and your business — from their first inquiry to long after the wedding — and how each one makes them feel. Not just what you deliver, but how supported, informed, and cared for they feel while you’re delivering it.
It’s not a “nice to have” that sits next to your actual job of taking photos. It is part of the job. Couples trust you with one of the biggest, most emotionally loaded days of their lives, along with a few thousand dollars, and trusting you’ll handle both with care. The way you communicate before, during, and after the wedding is just as much a part of that trust as your portfolio is.
And it directly affects the stuff you actually care about running a business: whether they leave a five-star review that mentions more than “great photos,” whether they refer their engaged friends without being asked, and whether they come back to you for an album, a vow renewal, or their kid’s newborn photos in a few years.
Why client experience is your most underrated marketing channel
Let’s talk numbers for a second, because this isn’t just a feel-good idea, it’s a business lever.
Couples spend an average of $3,000 on their wedding photographer, according to The Knot’s Real Weddings Study, based on responses from over 10,000 US couples. That’s not a small, forgettable line item in someone’s budget. It’s one of the purchases they’re most emotionally invested in getting right.
And when it comes to how couples actually find and choose vendors, referrals are right up there with Google search as a top lead source, according to Sara Does SEO’s Wedding Pro Survey, which surveyed 500+ wedding professionals directly. Meaning: every couple you book is a potential source of your next several inquiries, or a dead end, depending entirely on how the experience felt.
Here’s the part that should really sink in: the average couple works with around 14 vendors for their wedding. That’s 14 different experiences competing for space in their memory when someone later asks “who did your photos?” or “any vendors you’d actually recommend?” The photographer who gets specifically named in that conversation usually isn’t the most talented one in the bunch. It’s the one who made the couple feel the most taken care of, from the very first email.
Phase 1: The inquiry
Build trust before they even book
Client experience starts way before a contract exists. It starts the moment someone fills out your inquiry form, nervous and a little unsure, wondering if they’ll even hear back, let alone whether you’re the right fit or in budget.
What this phase needs:
- A fast, warm response: 24 to 48 hours is the standard to aim for, not “whenever I get to it”
- Clear next steps, so they know what happens after they inquire and when
- Pricing or investment information that doesn’t require three back-and-forth emails to extract
- Answers that feel calm and confident, not like you’re auditioning for the job
This is also where your website is doing a lot of the client experience work before you ever say a word. If your site is vague, slow, or unclear about who you’re for, you’re already asking couples to trust you with less information than they need. (If you’re not sure whether your site is helping or hurting here, this rundown of wedding photographer website must-haves is a good gut check, and this one on common photography website mistakes covers what quietly repels the inquiries you actually want.)
What to send: the inquiry response
The goal here isn’t to sound impressive. It’s to sound like a real, warm, organized person who has this handled.
Subject: Re: Your wedding inquiry — so excited to hear from you!
Hi [Names],
Congratulations on your engagement and thank you so much for reaching out about your wedding on [Wedding Date]! I’d love to be considered for your day.
A little about how I work: [1-2 sentences on your style/approach]. I currently have your date marked as available, and I’d love to learn more about your plans.
Here’s what happens next:
I’ve attached my pricing guide so you have all the details up front, no guessing games. If it feels like a good fit, the easiest next step is a quick call so we can chat about your vision and I can answer any questions. You can grab a time that works for you here: [booking link].
If you have any questions before then, just hit reply. I’m always happy to help.
So excited about the possibility of being part of your day!
[Your name]
Phase 2: Booking
Turn the “yes” into reassurance
Someone just said yes to spending several thousand dollars with you. That’s a big, slightly nerve-wracking moment for them, and it’s the exact moment most photographers accidentally go quiet, or worse, purely transactional.
This phase covers the contract, invoice, and payment, but it shouldn’t stop there. Pair it with:
- A warm booking confirmation or welcome email, not just an auto-generated receipt
- A clear “here’s what happens next” moment
- Confirmation of when they’ll hear from you again, so they’re not wondering
- Their date going straight into your CRM or calendar with any key reminders attached
This is the point where a lot of photographers treat “you’re booked!” as the finish line. But it’s actually the starting line!
What to send: the booking confirmation & welcome email
Subject: You’re officially booked! Here’s what happens next 🎉
Hi [Names],
I am SO excited — you’re officially booked for [Wedding Date], and I could not be happier to be part of your day.
Here’s what to expect from here:
Your contract and invoice have been sent to [email/portal]. Once that’s signed and your deposit’s through, you’re all set. I’ll be adding your date to my calendar right away, and you’ll hear from me again around [timeframe, e.g. “6 months out”] to start diving into planning details.
In the meantime, I’m attaching something I send all my couples right after booking: a full guide covering what to expect, timeline tips, getting-ready advice, and answers to just about every question you might have between now and the big day. Keep it handy, it’s genuinely useful.
If anything comes up before then, my inbox is always open. Thank you again for trusting me with something this important, I can’t wait!
[Your name]
Phase 3: Post-booking
Give them something to come back to
This is the phase almost everyone underbuilds, and it’s arguably the most important one in this entire blueprint.
Here’s why: right after booking, couples are excited, probably a little anxious about the money they just committed, and actively looking for reassurance that they made the right call. They’re also, for maybe the only time in this whole process, genuinely eager to read whatever you send them. That window closes fast, don’t waste it on a generic “yay you’re booked!” email and nothing else.
A proper post-booking touchpoint should give them somewhere to actually land. Something that covers:
- Your process and what to expect from working with you
- What happens next, and when
- Early planning guidance like timelines, engagement session prep, what to wear
- Answers to the questions you get asked on repeat: what to wear, how long portraits take, what happens if it rains
- How you communicate, and what they can expect from you
- What comes after the wedding: album info, print options, gallery delivery
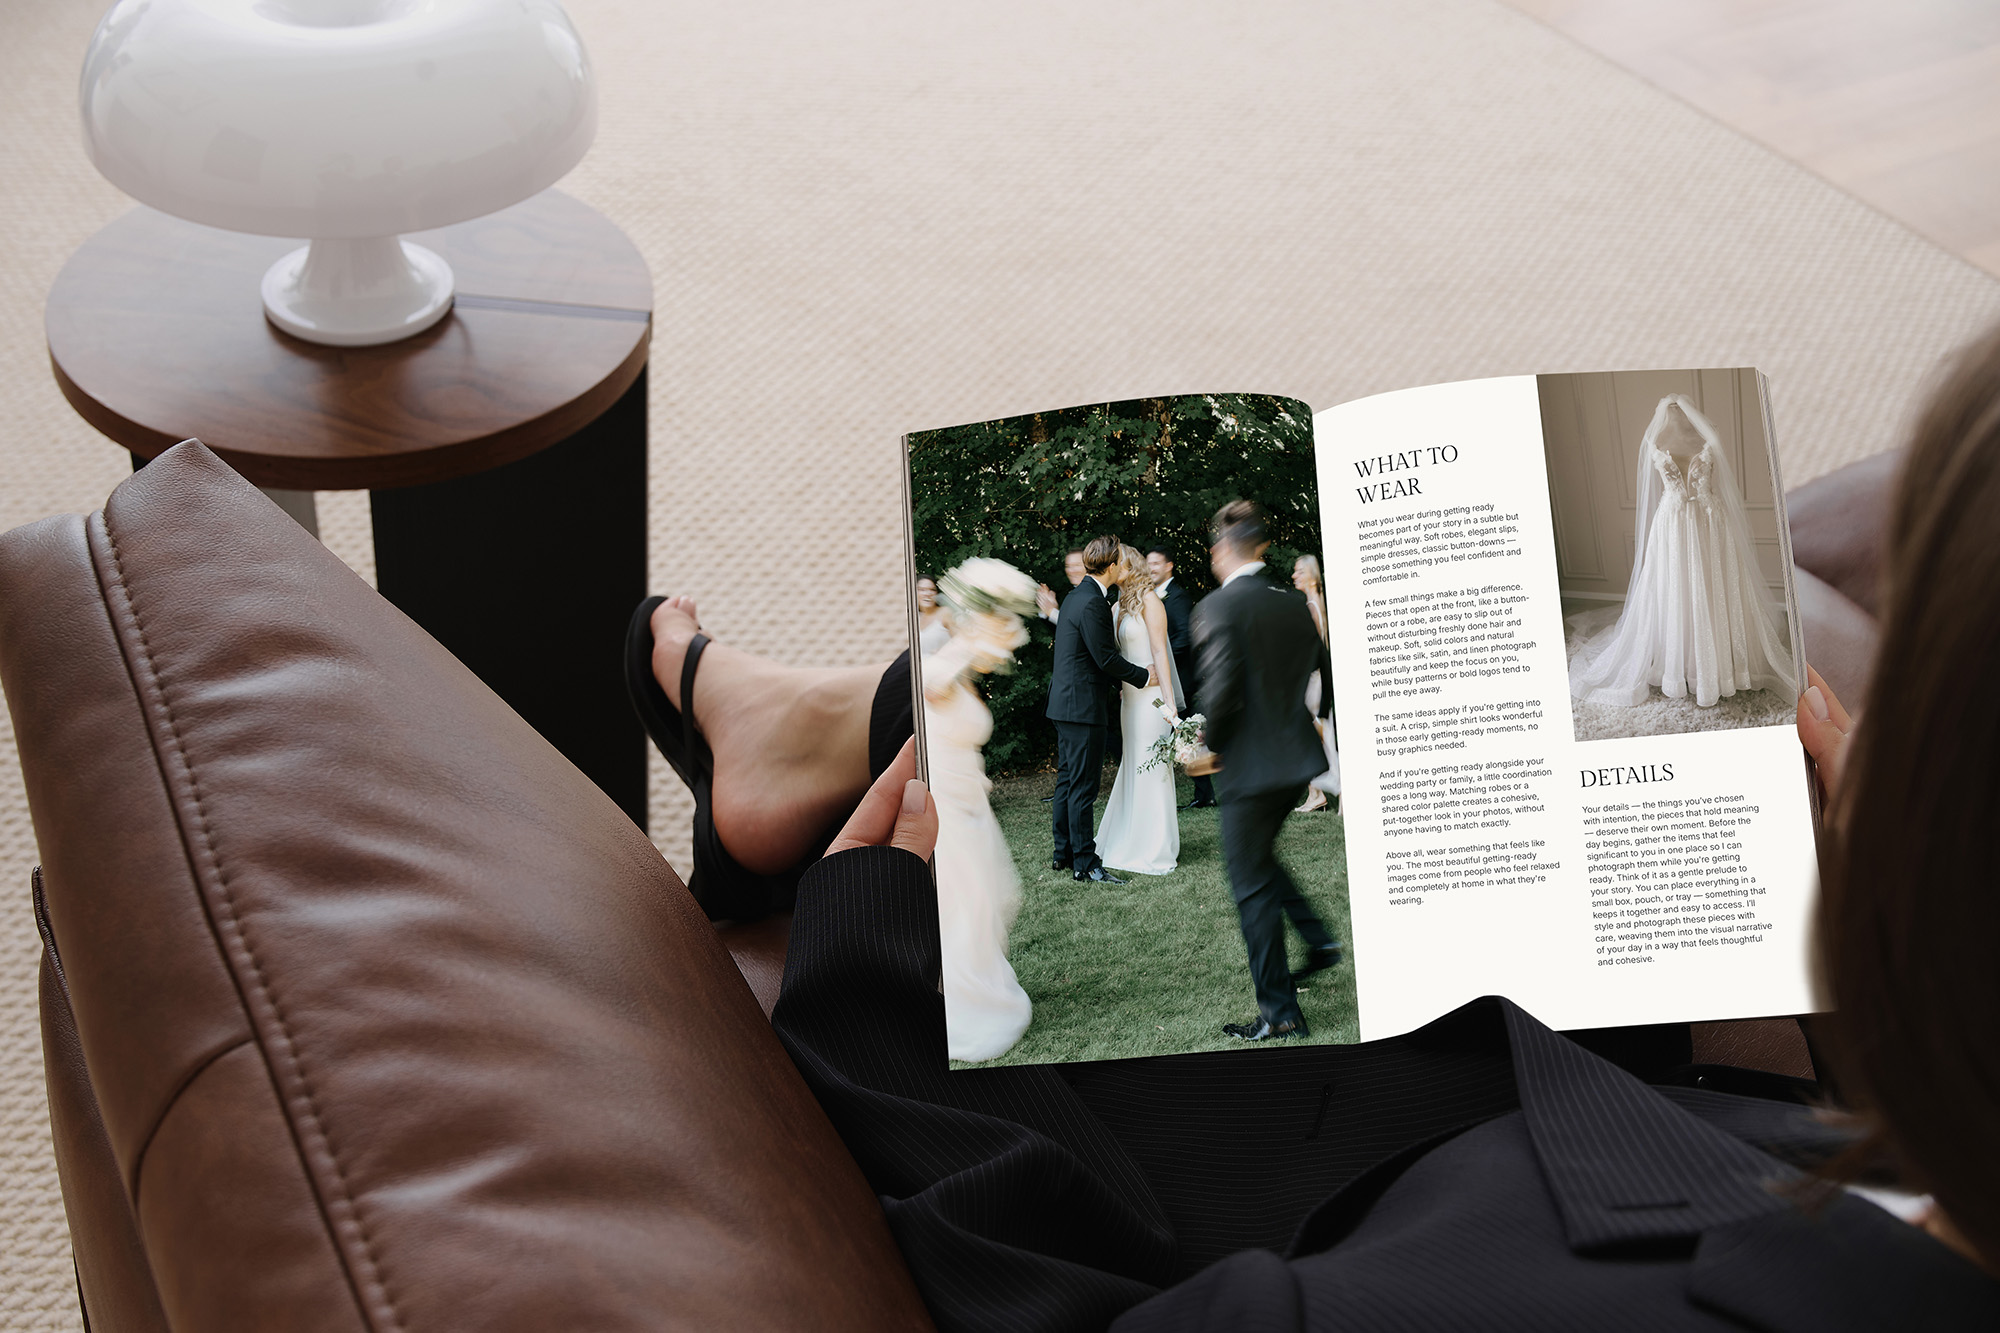
This is exactly the gap a client welcome guide fills. Not a bullet-pointed PDF that looks like it was thrown together between edits, but something branded, thoughtful, and genuinely useful enough that they forward it to their mom and reopen it three times before the wedding.

A welcome note is usually the very first page, and it sets the tone for everything after it. Something like:
Welcome to the family! We are beyond thrilled to be photographing your wedding day. This guide is here to walk you through everything — from what to expect in the coming months, to planning tips, to what happens after your wedding. Keep it handy, come back to it whenever a question pops up, and know that we’re just an email away if you need anything else. Here’s to an incredible journey to your wedding day!
If building a guide like this from scratch has been sitting on your “someday” list (it took a photographer I know three years to get past page 3 — we’ve all been there 🖤), the Wedding Photography Client Welcome Guide Template is exactly this touchpoint, done for you. It’s 80+ pages, fully written and designed in Canva, covering everything from pre-wedding prep to ceremony types, portrait guidance, timelines, and vendor recommendations, plus genuinely helpful (not pushy) prompts for engagement sessions, after-wedding shoots, and albums built right in. You just add your branding and photos, then send (or print it as a beautiful magazine-style guide).
Phase 4: Planning
Collect what you’ll actually need
Somewhere in the months before the wedding, you need the details that make the day actually run. This is also where a lot of the “surprise” stress on wedding days comes from, not because the couple didn’t know something, but because you didn’t ask.
A solid client questionnaire should dig into:
- Full names, wedding party names, and how to pronounce anything tricky
- Ceremony and reception venue details, including any venue-specific photography restrictions
- Key vendor contacts: planner, coordinator, videographer, florist
- Family dynamics worth knowing about (divorced parents, family members who shouldn’t be grouped together, anyone with mobility needs)
- Must-have shots and any specific requests
- Timeline priorities: is a first look happening? Any traditions or cultural elements you need to plan around?
- Getting-ready locations for both partners, and how much natural light is in each
- Anything they’re anxious or excited about for the day
Frame this to your couples as helping the day go smoothly, not as admin they owe you. “The more I know ahead of time, the less you have to think about on the day” lands a lot better than a form that feels like paperwork for paperwork’s sake.
Phase 5: Education
Answer questions before they turn into stress
This phase overlaps with your welcome guide, but it’s worth calling out on its own because it’s ongoing, not a one-time send. The goal: the fewer questions a couple has to Google or guess at, the calmer they feel, and the calmer they feel, the better they show up on the actual day.
A few things worth proactively covering, even if they’re already in your guide:
Getting-ready tips: What to wear (light colors and looser fabrics photograph better than logos or tight patterns), how much natural light matters in the room, and roughly how long hair and makeup realistically takes when photos are factored in.
First look guidance: If they’re deciding whether to do one, lay out the honest trade-offs: a first look usually means a calmer couple, more portrait time, and a more relaxed cocktail hour, while skipping it preserves that big aisle-walk reveal moment. Neither is “more romantic.” It’s a genuine preference, and they should pick knowing both sides.
Family portrait logistics: A short, specific shot list (by name, not just “family photos”) and a heads-up to designate one person to help wrangle family members saves an enormous amount of time and stress on the day.
Timeline education: Golden hour, when light gets harsh, how long portraits realistically take. Couples don’t know this instinctively, and a rushed timeline is one of the most common sources of wedding-day stress for everyone involved, including you.
Most of this content lives permanently in your welcome guide. Some of it is better as a quick check-in closer to the date.
Phase 6: The final weeks
Make the countdown feel calm, not chaotic
The last few weeks before a wedding are when nerves peak, no matter how organized the couple is. This is where you send the final questionnaire, review the timeline together, share your (or your second shooter’s) contact info, note any weather backup plan, and send a clear “here’s what to expect from me” message.
What to send: the final details email
Subject: Two weeks to go! Here’s everything for the big day
Hi [Names],
I cannot believe your wedding is two weeks away! Here’s everything you need from me before then:
Final timeline: attached, reviewed and locked in based on our last conversation. If anything’s changed, just let me know as soon as possible.
Day-of contact: you can reach me directly at [phone number] on the day itself for anything time-sensitive. For everything else, email still works great.
Weather: if there’s rain in the forecast, don’t panic — we’ll figure out a backup plan together, and honestly, some of my favorite photos have come from “plan B” weather.
What to expect from me: I’ll arrive [timeframe] before the first scheduled moment, and I’ll check in with you and your coordinator throughout the day so you never have to think about where I am or what’s next. Your only job that day is to be present. I’ve got the rest.
So close now. I can’t wait!
[Your name]
Phase 7: The wedding day
Client experience you can’t automate
Every touchpoint up to this point has been building toward one thing: how you actually show up on the day. This is the part of client experience that no template or automation can replace.
It looks like: staying calm when the timeline slips (it always slips a little), guiding people clearly without taking over their day, communicating well with the planner and other vendors, and making the couple feel like they can hand you the logistics and just be present. A few things that make a visible difference: introducing yourself to the coordinator and key family members early so you’re not a stranger giving instructions, keeping a light, reassuring tone even when things go sideways, and gently managing the “just one more photo” family members without letting them derail the whole schedule.
If everything before this point did its job, the couple already trusts you completely by the time you show up, which means less explaining, less anxiety, and more of them actually enjoying their own wedding.
Phase 8: Right after
Don’t go quiet
The wedding’s over. You’re exhausted. It’s tempting to disappear into your editing cave for a few weeks and resurface when the gallery’s ready. Resist that — couples come down from wedding-day adrenaline fast, and a little contact keeps the excitement (and your professionalism) fresh in their minds.
What to send: the next-day thank you
Subject: Still thinking about your wedding day 🤍
Hi [Names],
I’m still on such a high from yesterday, your wedding was absolutely beautiful, and I feel so lucky I got to be there for it.
I’ll be diving into editing soon, and I’ll have a few sneak peeks over to you within [timeframe]. Your full gallery will follow within [full delivery timeframe].
Congratulations again, [Names]. Talk soon!
[Your name]
What to send: the sneak peek announcement
Subject: A little preview is here! ✨
Hi [Names],
I couldn’t wait to share a few of my favorites from your wedding day — [link]. The full gallery is on its way and will be ready by [date].
Enjoy this little sneak peek in the meantime!
[Your name]
Phase 9: Gallery delivery
Make it feel like an event, not just a link
This is the moment a couple has been waiting weeks, sometimes months, for. Don’t undersell it with a bare “here’s your link” email.
What to send: the gallery delivery email
Subject: Your wedding gallery is here 🥂
Hi [Names],
The day is finally here! Your full wedding gallery is ready, and I am so excited for you to see it: [link to gallery].
A few things to know:
You can download your favorites individually, or grab the whole gallery at once using the download-all button. You have full sharing and printing rights for personal use, so feel free to share with family and friends, post your favorites, and print away.
If you’re interested in an album, this is the perfect time to start thinking about it. I’d love to help you turn some of these into something you can hold in your hands for years to come. [Link to album info, if relevant.]
Thank you again for trusting me with your day. It truly meant so much to be part of it.
[Your name]
Cover how to download and share their photos, what their print and sharing rights actually are, and a genuine next step for albums or prints if that’s part of your offering. A gallery that’s easy to navigate and beautifully presented, not just functional, reinforces everything you’ve built up to this point.
Phase 10: Testimonials & referrals
Turn taken-care-of couples into your marketing team
Here’s the thing about reviews and referrals: they’re not random. They’re a direct reflection of how the whole experience felt, not just how the photos turned out.
Couples don’t usually have the language for “your client experience made me feel prioritized.” What they write instead is “she was so professional,” “we felt so taken care of,” or “we’ve already told three engaged friends to book her.” Those are client experience reviews wearing a photography review’s clothes.
What to send: the testimonial request
Subject: Would you mind sharing a few words? 🤍
Hi [Names],
I hope you’ve been loving looking back through your gallery! If you have a few minutes, I’d be so grateful if you’d share a quick review of your experience working together — it means the world to me and genuinely helps other couples find me.
Here’s the link: [review link]. If it’s helpful, feel free to touch on anything that stood out — communication, planning support, how the day itself felt, whatever comes to mind.
Thank you so much, truly. It’s been such an honor being part of your story.
[Your name]
What to send: the referral ask
Subject: A small favor 💌
Hi [Names],
If any of your friends or family get engaged this year, I would love an introduction! Referrals from couples like you are honestly one of the best parts of this job, and there’s no better compliment than someone trusting me with their friend’s big day too.
Feel free to just pass along my info, or if you’d rather make the intro yourself, I’m always happy to chat with anyone you send my way.
Thank you again for everything, it’s been such a joy.
[Your name]
A few practical notes on this phase:
- Timing matters: Ask for a testimonial once the excitement of gallery delivery is still fresh, not months later when the memory’s faded.
- Make it easy: A direct link to a short questionnaire or your google reviews and a couple of prompt questions get you better, more specific reviews than “let me know what you thought!”
- Ask for the referral separately, and later: Bundling it into the testimonial ask dilutes both. Send the referral ask a few weeks after, once the review’s already in.
- Share vendor galleries: Sending images to the planner, florist, and venue puts your work in front of their future couples too — free, warm referral traffic.
Referrals are still one of the biggest lead sources in this industry. Google search and vendor referrals consistently top the list of how wedding pros actually get booked. A client experience that makes people want to talk about you isn’t a nice bonus. It’s a legitimate marketing channel, and it’s free.
Phase 11: Long-term trust
Staying memorable after the wedding
The relationship doesn’t have to end at gallery delivery. Album follow-ups, an anniversary check-in, or a note when you’re offering mini sessions all keep you on a couple’s radar for years, which matters more than it might seem. Couples who felt taken care of are the ones who come back for anniversary sessions, order the album they almost skipped, or think of you first when a friend gets engaged three years from now.
What to send: the anniversary check-in
Subject: Happy anniversary! 🥂
Hi [Names],
I can’t believe it’s been a year since your wedding! I hope married life has been treating you well.
I was just looking back through your gallery and wanted to say again how much I loved photographing your day. If you ever want a print refresh, an album (if you don’t have one yet), or even a little anniversary session down the line, I’d love to be part of that too.
Hope you’re doing wonderfully. Talk soon!
[Your name]
None of this needs to be elaborate. A well-timed, genuine touchpoint beats a complicated nurture sequence every time.
The client experience mistakes that may cost you reviews and referrals
A few patterns worth checking yourself against, because they’re common and they’re sneaky — none of them look like “bad client experience” from the inside.
Going quiet after the deposit clears: The excitement of landing a new booking is real, but if the next thing a couple hears from you is a questionnaire three months later, that silence reads as “am I forgotten?” even if you’re just busy.
Answering the same questions differently every time: If your FAQ answers change slightly depending on your mood or how rushed you are, couples notice the inconsistency, even if they can’t name it.
Treating the welcome email as the finish line: “You’re booked!” is a beginning, not a milestone to check off and move on from.
Making the gallery delivery transactional: A bare download link after months of anticipation undersells the moment and misses a natural opening for album conversations.
Asking for reviews and referrals at the same time, immediately: It reads as a sales ask rather than genuine appreciation. Space them out.
Never following up after the wedding: The relationship that ends the second the gallery’s delivered leaves real revenue (and referrals) on the table.
The full wedding photographer client experience checklist
A skimmable version of everything above, organized by phase:
- Inquiry: fast response, clear next steps, accessible pricing info
- Booking: contract, invoice, warm confirmation email, calendar/CRM entry
- Post-booking: client welcome guide, early planning resources
- Planning: questionnaire, vendor details, timeline notes
- Education: getting-ready tips, timeline guidance, ongoing check-ins
- Final weeks: final questions, timeline review, “what to expect from me”
- Wedding day: calm presence, clear guidance, vendor coordination
- Right after: thank-you message, sneak peek timing, gallery timeline reminder
- Gallery delivery: thoughtful delivery email, sharing/print info, album next steps
- Offboarding: testimonial request, referral prompt, vendor gallery sharing, long-term touchpoints

The experience is the product, too
Your photography is the reason couples book you. Your client experience is the reason they leave the review that gets you the next couple, refer their engaged friends without being asked, and come back for the album they almost skipped.
None of this needs to be complicated or expensive to build. The biggest gap, for most photographers, is the post-booking phase — the moment couples are most eager for reassurance and most likely to actually read what you send them.
If that’s the piece you’ve been meaning to build (and, let’s be honest, have had a Canva tab open for), the Wedding Photography Client Welcome Guide Template is 80+ pages, fully written and designed, ready for you to brand and send. Get the guide here.
Your couples already said yes. Now make sure everything that happens next keeps reminding them it was the right call.
xx, Kim
FAQ
What is client experience in wedding photography?
It’s the full sequence of interactions a couple has with a photographer, from their first inquiry through the months after their wedding, and how each one makes them feel. It includes communication, planning support, day-of presence, and post-wedding follow-up, not just the final photos.
When should I send a wedding photography welcome guide?
Right after booking, either inside the welcome email or shortly after. This is when couples are most excited, most in need of reassurance after a big financial decision, and most likely to actually read what you send them.
What should be included in a wedding photography welcome guide?
A strong guide typically covers your process, planning timelines, what to expect at each stage, common FAQs like what to wear and how long portraits take, engagement session prep, and information about albums, prints, or delivery.
Does client experience really affect reviews and referrals?
Yes. Couples rarely separate “the photos were great” from “the whole process felt great” — the two blend together in how they talk about you. A strong client experience is one of the most direct ways to earn reviews that mention more than your photography, plus referrals from couples who genuinely want to talk about you.
How much of this should I automate versus personalize?
Automate the repeatable parts — welcome guides, FAQ answers, timeline templates, confirmation emails. Keep the wedding day itself, testimonial requests, and any one-off communication personal. The goal of automating the repeatable stuff is to free up more of your energy for the parts that actually need a human touch.
How long should the full client experience process take, from inquiry to final follow-up?
It varies with your booking window, but the touchpoints themselves don’t need to be time-consuming. Most of what’s outlined here takes minutes to send once you have templates ready. It’s less about time spent and more about making sure nothing falls through the cracks.
What’s the difference between a welcome guide and a welcome packet or box?
A welcome guide is the informational piece — your process, planning tips, FAQs, delivered digitally or in print. A welcome packet or box adds physical gifting on top (candles, notebooks, small treats). The guide is the higher-leverage piece to get right first; the physical extras are a nice-to-have layered on top later.
Published on July 10, 2026
Written by Kim Preis


